How to Make a Origami Baby Polar Bear Face
No matter how old I get, I'll always love making easy paper crafts. There's just something so satisfying about turning a simple thing that we used everyday into some kind of character or something useful! Recently, in trying to come up with new ideas to teach my kids so they'll love paper crafts as much as I do, I found a way to combine those two things and make something from paper that's both cuteand useful. That's how we found ourselves making these awesome polar bear bookmarks!
Just in case you'd like to learn how to make polar bear bookmarks too, here's a full set of instructions complete with photos. If you're more of a video tutorial fan, scroll to the bottom of his post to find one!
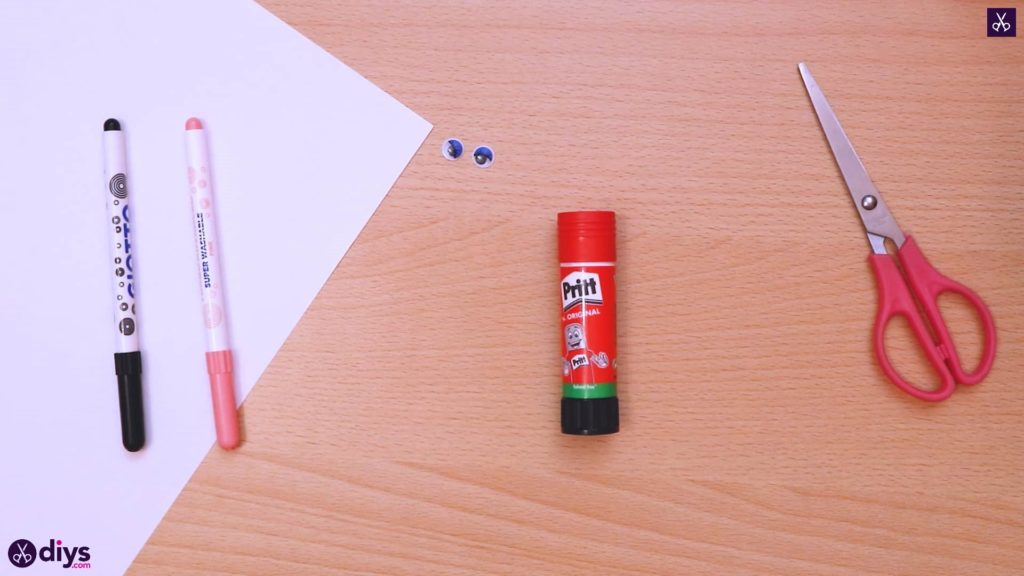
For this project, you'll need:
- White paper
- Glue stick
- Scissors
- Googly eyes
- Markers (black and pink)
Step 1: get what you need
Gather your materials before you begin!
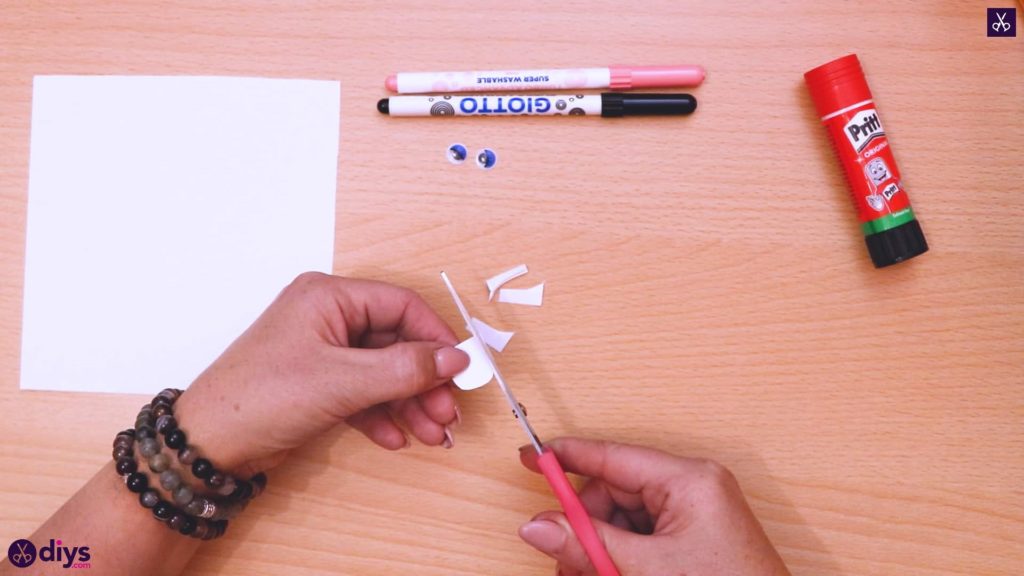
Step 2: make the ears
Turn your piece of paper landscape and cut it in half. Then, cut a piece about two inches wide off the end of one half, leaving with with a rectangular strip and a square (you can set the other entire half aside). Cut a half inch strip off the end of your rectangular piece and fold it in half. Cut an ear shape into that, keeping the bottom edge straight and rounding off the corners and edges above that. Because you folded the sheet in half, you'll end up with two little ears for your polar bear!
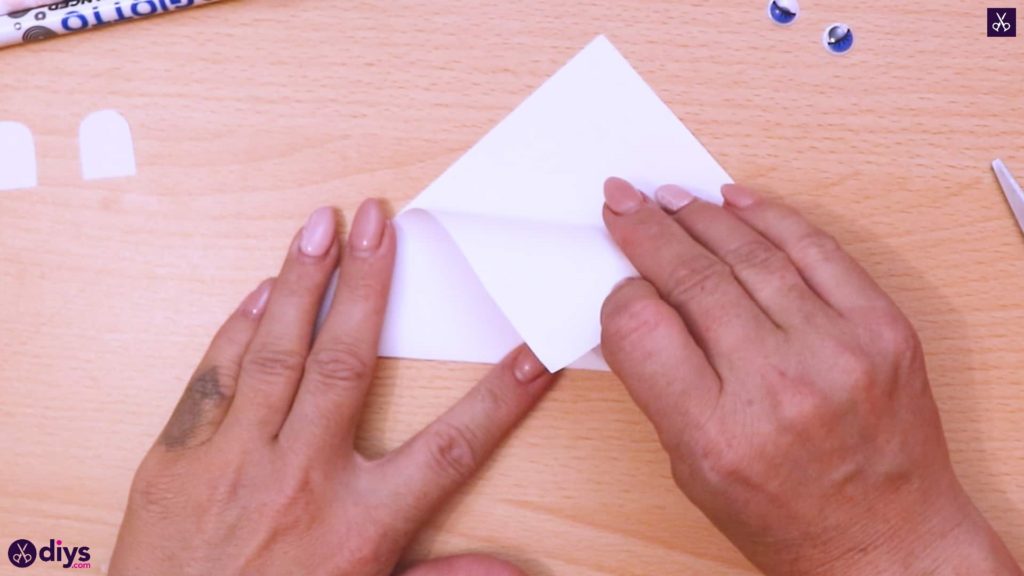
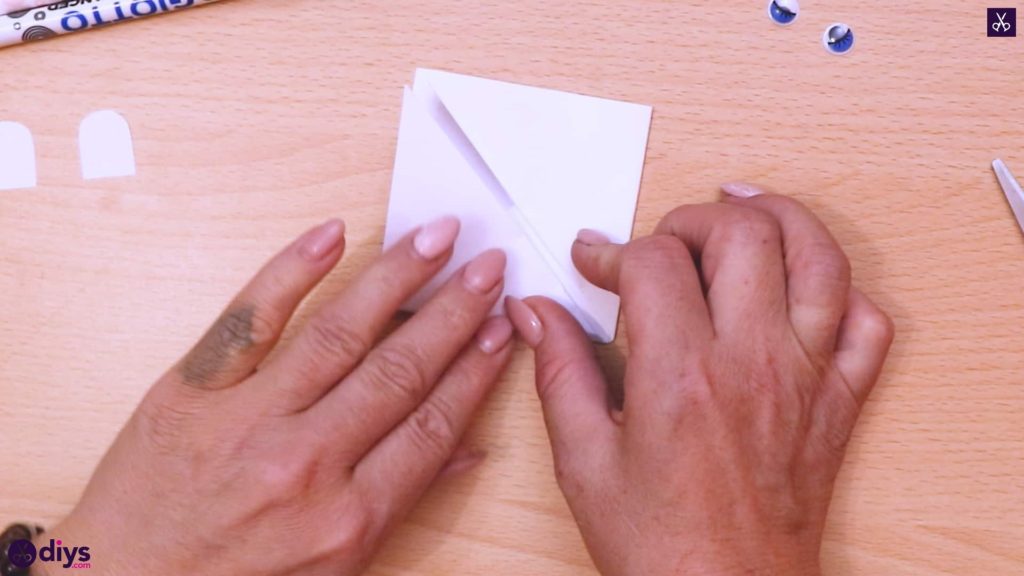
Step 3: start folding
Take your white square piece and turn it so it looks like a diamond, with a corner at the top and the bottom. Fold it in half upwards, so the bottom point meets with the top point, and then take the top point of your top half and turn it back down on itself again, folding it so the point meets up with your bottom folded edge.
Step 4: repeat
Turn your newly triangular shape so you can take the right hand point and fold it upward on a diagonal so the top meets top top point. Repeat the process on the other side, folding the bottom left corner to meet up with the top point. You now have a square shape!

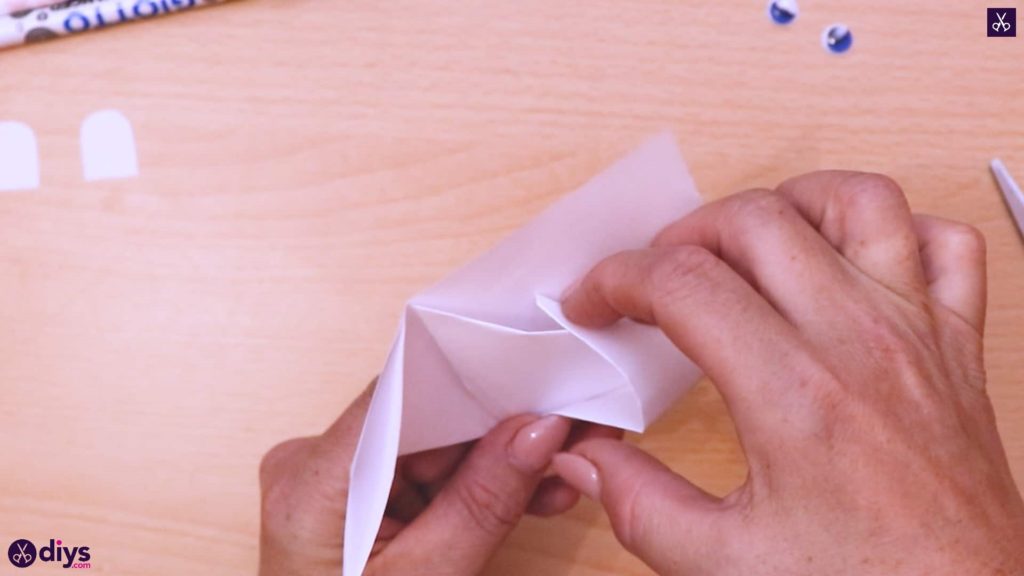
Step 5: fold corners
Unfold the corners you just creased upwards (those creases will make things easier for other folding moves later) and then bring each bottom point, first the right and then the left, inward horizontally to meet the folded down point that sits at the center of your bottom crease.
Step 6: tuck corners
Unfold your corners from this horizontal shape like last time, then use the previous upward creases you made to bring them upwards again. This time, instead of meeting your bottom tips up with the top point, you'll tuck them behind your original downward-pointing fold. You once again have a diamond shape, but with layered folds on the bottom front half and a singularly layered point at the top.
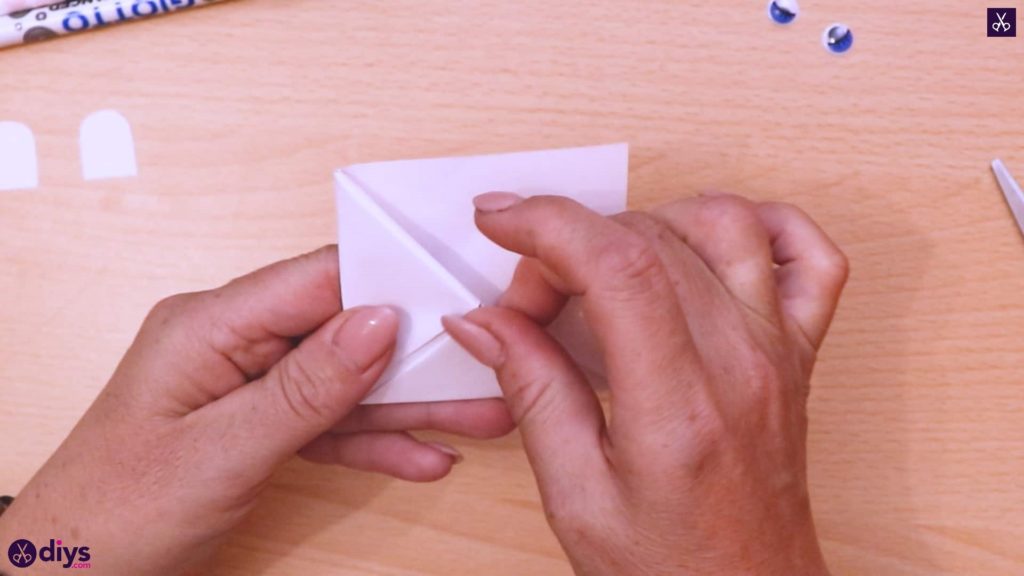
Step 7: repeat
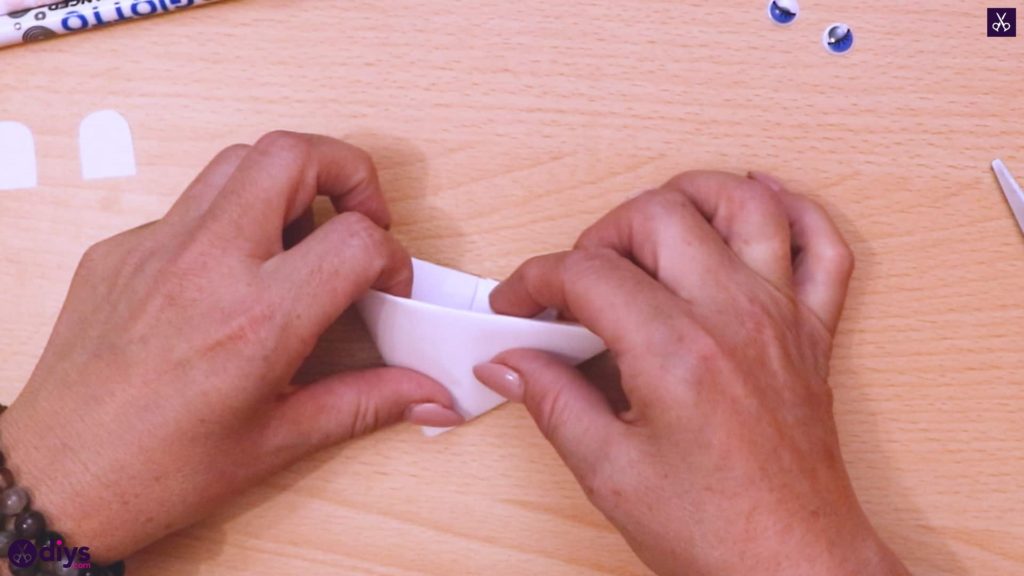
Turn your shape over so the opening is on the table now and fold your top point in and down, tucking it into the pocket you've created the way you tucked your previous pointed ends. You now have an upside down triangular shape with an opening inside.
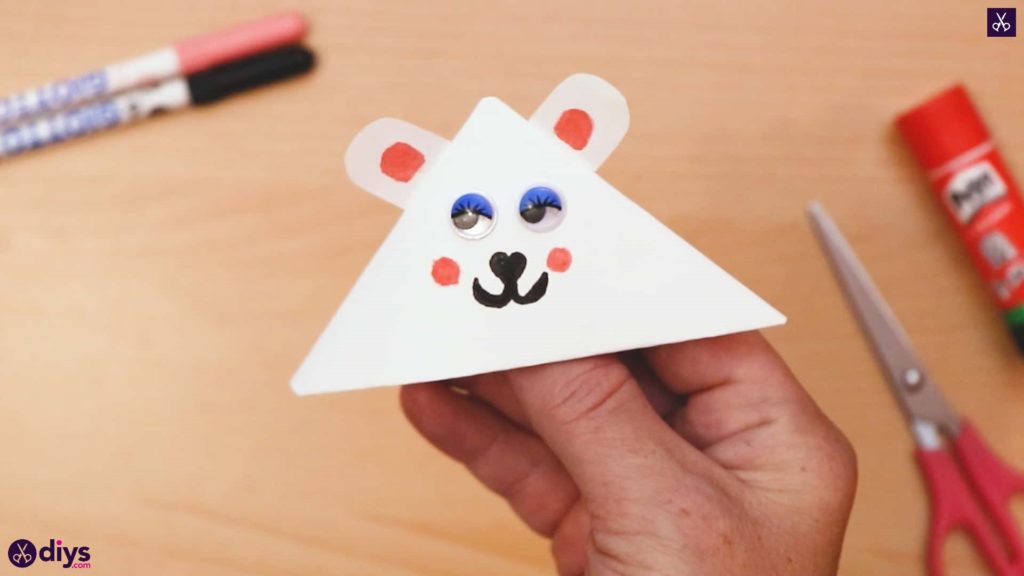
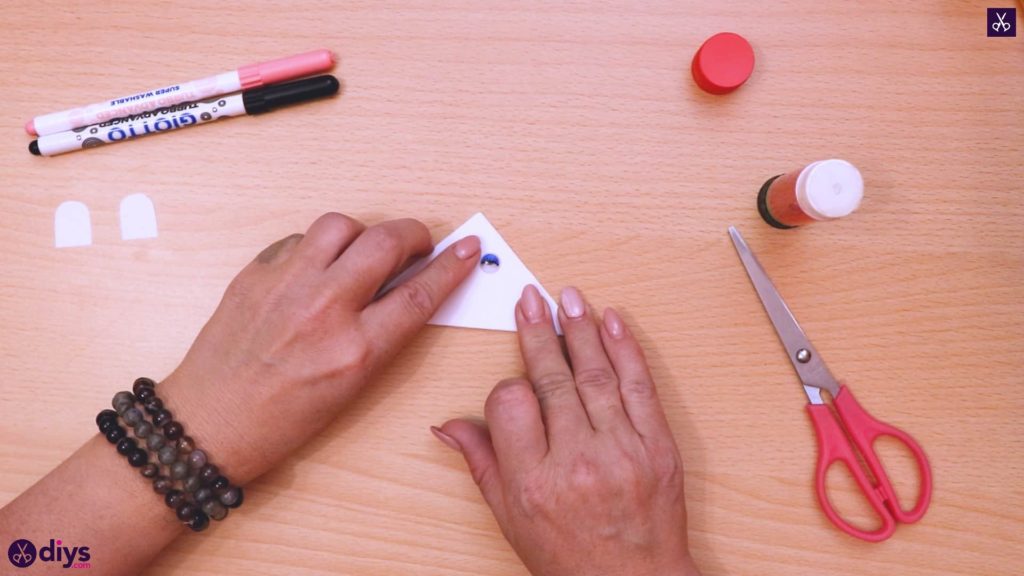
Step 8: add eyes
Flip your shape around so the bottom tip faces upwards instead, like an upright triangle. Apply glue to the back of each googly eye and stick them down near the top of the shape, where your bear's face might sit.
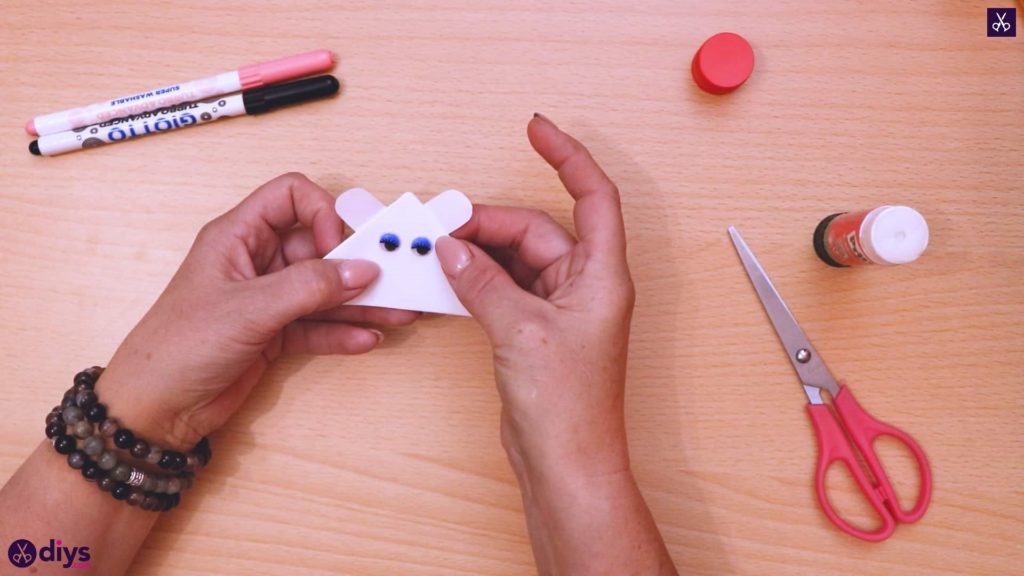
Step 9: add ears
Apply glue to the bottom fronts of your ear shapes and stick them to the back of your triangle so they stick up and out the front, near the top and above the eyes.
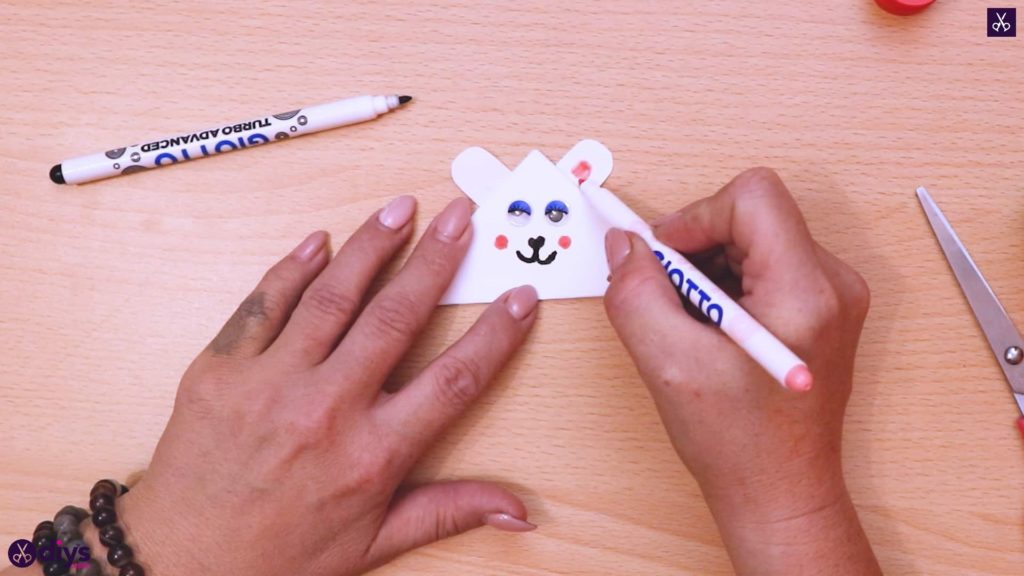
Step 10: draw face
Use your black and pink markers to draw on the rest of your bear's facial features! I used black for the mouth and nose and pink for the inner ears and cheeks.
Your bear is ready to use as a bookmark! Slide the corner of your page into the opening inside the bear to mark your place, while its face and ears stick right out when you close the book. Just in case you'd like to try this project out for yourself, here's a fantastic tutorial video to help you!
How to Make a Origami Baby Polar Bear Face
Source: https://www.diys.com/polar-bear-corner-bookmark/
Belum ada Komentar untuk "How to Make a Origami Baby Polar Bear Face"
Posting Komentar